
Your First Pull-Up: Five Practice Options and How to Choose
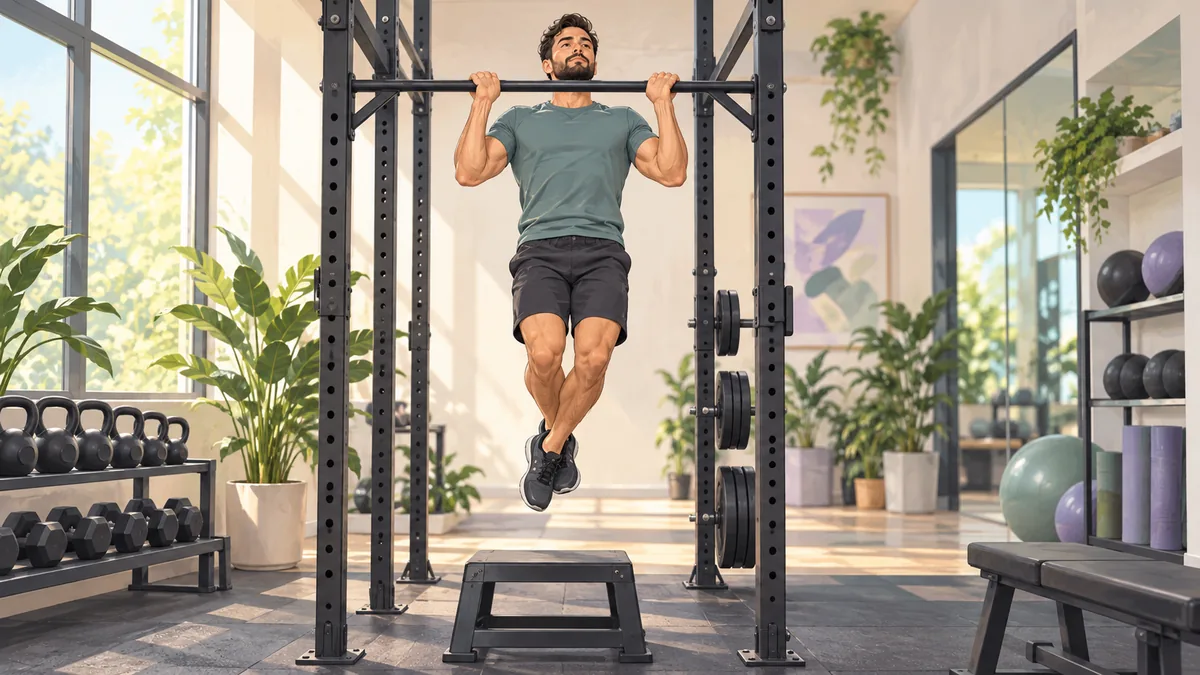
A first pull-up combines grip, pulling strength, and control of your body on a bar. You can practise those parts separately. You do not have to exhaust every hang or pass a timed test before exploring another suitable variation.
The five options below are a practice menu, not a proven sequence or a prediction of when you will reach a full repetition. Choose one or two that you can control, ideally with a coach checking your setup.
Equipment and getting off the bar
Use a purpose-built pull-up bar installed, maintained, and rated for your load according to its manufacturer. Arrange a stable exercise step so you can reach the bar and return your feet without jumping or dropping. Keep the landing space clear. Do not improvise anchors from door handles, tables, or loose furniture.
For rows, use a rated low bar or suspension trainer. If equipment cannot be secured, choose another part of your strength routine until it can.
Five practice options
1. Foot-supported hang
Grip the bar with feet on the step and gradually transfer a comfortable amount of weight into your hands. Keep enough foot support to return under control. A full unsupported hang is optional and may not suit every shoulder.
Try a few short holds, perhaps 5–10 seconds each. Add time only while grip and shoulders remain comfortable. Do not hang until your hands release unexpectedly.
2. Upright row
With your feet supported on the floor, lean back from the rated handles or low bar and pull your torso toward them. Keep the body controlled. An upright angle can reduce the challenge; a lower angle can increase it.
One or two sets of 5–8 repetitions are an example starting amount. Record body angle or foot position rather than treating all rows as equivalent.
3. Foot-assisted pull-up
From a setup your equipment allows, use your legs on the exercise step to help you lift and lower. Avoid pressing your chin forward just to clear the bar. Reduce leg assistance gradually while keeping the return controlled.
This lets you practise both directions without needing a long flexed-arm hang first.
4. Controlled lowering
Only try a negative if you can enter the top position and return your feet to the step reliably. Begin with one or two assisted lowerings rather than several sets of maximal negatives. If you drop through part of the movement, increase assistance or return to rows.
Lowering work can cause soreness when unfamiliar; see DOMS. A five-second descent is a possible logging target, not evidence that a full pull-up is now safe or guaranteed.
5. Full pull-up attempt
When a controlled attempt seems appropriate, try one while fresh. Pull without kicking or swinging, and lower to a comfortable starting position. If you cannot rise or control the descent, return to an assisted option. Repeated failed attempts are not required.
Resistance bands are optional. Follow their manufacturer’s setup guidance and inspect for damage; an incorrectly placed or slipping band can recoil. Foot assistance may be easier to adjust without handling a stretched band.
Make a session from the menu
An example is a short supported hang followed by one or two sets of rows or assisted repetitions. Do not perform every option at full volume. Start with two non-consecutive pulling sessions within your existing plan and adjust to recovery. Mayo Clinic advises a day between workouts for the same muscle group; that is not a guarantee that everyone recovers in that time.
Use the log to find the next change
| What happened | Next choice |
|---|---|
| Grip fades before the planned repetitions | Shorten the set or increase foot assistance |
| Body swings | Use more assistance and a slower, repeatable movement |
| Repetitions are controlled across several sessions | Change one variable: assistance, repetitions, or angle |
| Elbow or shoulder pain | Stop painful loading; seek individual assessment if persistent or concerning |
There is no reliable personal deadline. Compare the same setup over time and include pushing work in the wider plan. A stalled pull-up is not a reason to restrict food or keep adding painful hangs.
Sources and further reading
These resources support the topics noted below. The practice routine and progression checkpoints are Ko Myat examples, not programs endorsed by these sources.
- Mayo Clinic: Strength Training — General resistance selection and recovery guidance; not validation of skill checkpoints.
- ACSM: 2026 Resistance Training Guidelines — Healthy-adult resistance training, individualization, and home-based options; not a gymnastics protocol.
More Fitness guides
Beginner Bodyweight Workout: An Adjustable Home Strength Plan
Start a bodyweight strength routine with manageable sets, easier variations, equipment checks, and a log that helps you decide when to progress.
· 3 min read

How Many Rest Days Do You Need? A Practical Guide to Recovery
How to plan rest days for bodyweight, gymnastics, and flexibility training, what active recovery looks like, and the warning signs that you need more rest.
· 3 min read
Muscle Soreness After a Workout: Should You Train Through It?
Understand delayed soreness, recognize symptoms that need medical care, and adjust activity without treating an online checklist as a diagnosis.
· 3 min read